I’ve previously used Handlebars templates in projects, but only in the simple ways– i defined a <script> block as inline html templates, and used in my js code.
![]()
However, i have a project where i need all the code, including html templates, as js files.
Luckily Handlebars can do this, but we’ll need to set up the proper node-based build environment to do so.
- node.js
- gulp task runner
- bower for flat package management
- handlebars for templates
The templates will get “precompiled” by gulp, resulting in a pure js file to include in the html page. Then we’ll be able to code in HTML, but deploy as JS.
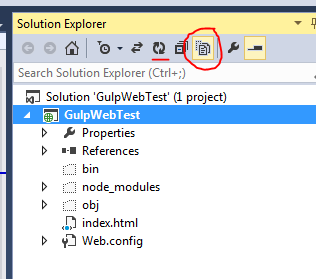
First i create a new empty ASP.NET Web project in Visual Studio. I’ll call it: HandlebarsTest. Note that almost none of this is Visual Studio-specific, so 95% is applicable to any other development environment.
Next, i will set up Gulp and Bower, similar to how i did it in my 2 prior posts:
- Using Bower for JS package management instead of NPM
- Learning Gulp with Visual Studio – the JavaScript Task Runner
I will create the gulpfile.js like so (we’ll add it it):
var gulp = require('gulp');

gulp.task('default', ['scripts'], function() {

});

gulp.task('scripts', function() {
});
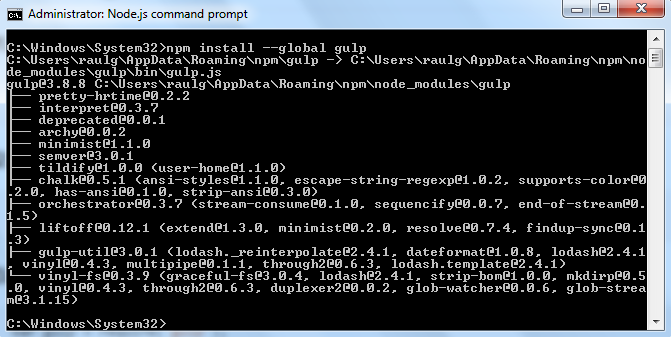
Open the node command prompt, and change to the new directory
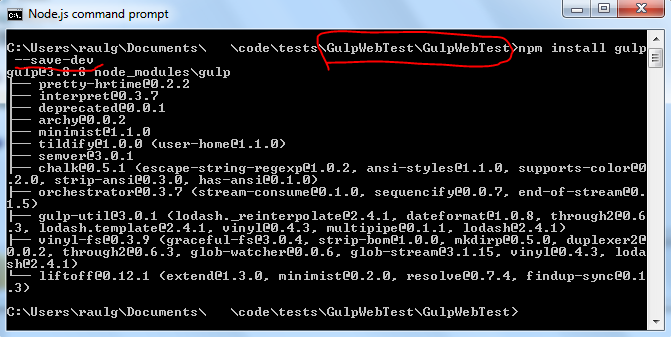
cd HandlebarsTest\HandlebarsTestnpm initnpm install -g gulpnpm install gulp --save-devnpm install gulp-uglify --save-devnpm install gulp-concat --save-devnpm install gulp-wrap --save-devnpm install gulp-declare --save-dev
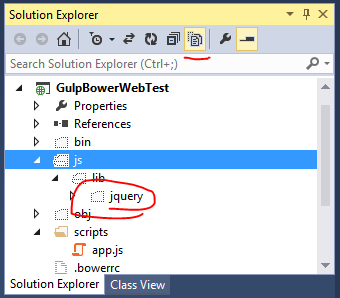
I will create the .bowerrc file like so:
{
    "directory": "js/lib"
}
OK, now for some handlebars stuff. One thing to understand is we need to do handlebars stuff at build/compile time AND at runtime. That means:
- the precompilation will be run by gulp during build time (install gulp-handlebars using npm), and
- the web browser will execute the templates with the handlebars-runtime library (install to the project using Bower)
npm install gulp-handlebars --globalnpm install gulp-handlebars --save-dev
Bower (client-side) packages
I will use Bower to install the client side libs: handlebars, jquery, etc. First, create the bower.json file.
bower initNext, start installing!
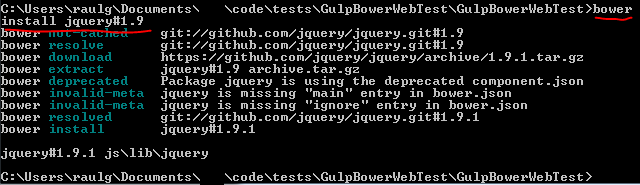
bower install jquerybower install handlebars
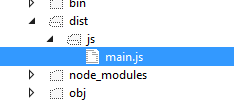
Those files get installed to /js/lib/* , per my .bowerrc file. Now we can reference them in scripts, or use them for js bundles.
HTML, Javascript, and Handlebars templates together.
My use-case is to:
- Have a static HTML page
- Include a script tag which loads a single JS file
- The single JS file will load/contain the libraries AND the main execution code
- the main execution code will render a DIV element which renders a Handlebars template with an object.
HTML page just includes a single JS , which will be built:
<!DOCTYPE html>
<html xmlns="http://www.w3.org/1999/xhtml">
<head>
    <title>Handlebars Test</title>
    <script type="text/javascript">
    (function() {
        function async_load(){
            var cb = 'cb=' +(new Date).getTime();

            var rmist = document.createElement('script');
            rmist.type = 'text/javascript';
            rmist.async = true;
            rmist.src = '../js/dist/bundle.js?' + cb;
            var x = document.getElementsByTagName('script')[0];
            x.parentNode.insertBefore(rmist, x);
        }
        if (window.attachEvent)
            window.attachEvent('onload', async_load);
        else
            window.addEventListener('load', async_load, false);
    }());
    </script>
</head>
<body>

    <h1>Handlebars Test</h1>

    <p id="main-content">
        There will be a dynamic element added after this paragraph.
    </p>
    <p id="dynamic-content"></p>

</body>
</html>
Handlebars templates will be in /templates/*.hbs . Here’s an example, i’m calling /templates/hellotemplate.hbs:
<div class="hello" style="border: 1px solid red;">
    <h1>{{title}}</h1>
    <div class="body">
        Hello, {{name}}! I'm a template.
    </div>
</div>
Javascript will be in the /js/app/app.js and the other libraries
Here, i’m taking direction from https://github.com/wycats/handlebars.js#precompiling-templates
gulp-handlebars handles the precompilation. We will run the ‘gulp’ build process to precompile hbs templates to js later.
The app.js code will need to render the precompiled template with the data object, and add to the DOM somehow (using jQuery in this case).
"use strict";
var data = { title: 'This Form', name: 'Joey' };
var html = MyApp.templates.hellotemplate(data);
// console.log(html);

$(document).ready(function () {
    $('#dynamic-content').html(html);
});
Precompiling the templates and using them
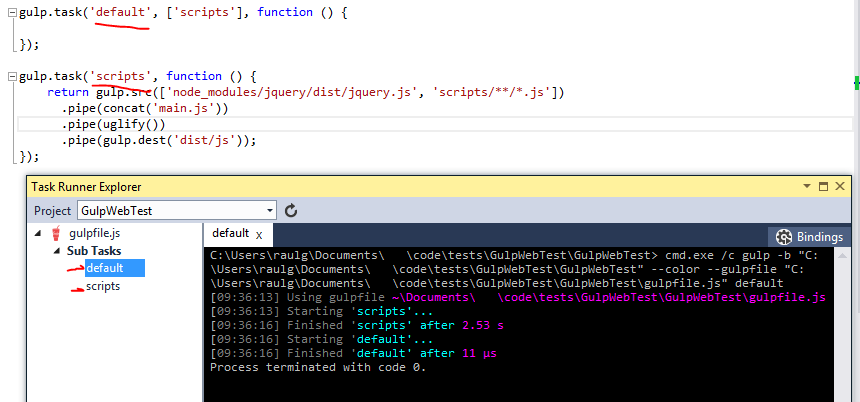
I will modify the gulpfile.js to add a task for template compilation. This is my final version:
var gulp = require('gulp');
var uglify = require('gulp-uglify');
var concat = require('gulp-concat');

gulp.task('default', ['templates','scripts'], function () {

});

var handlebars = require('gulp-handlebars');
var wrap = require('gulp-wrap');
var declare = require('gulp-declare');
var concat = require('gulp-concat');

gulp.task('templates', function () {
    gulp.src('templates/*.hbs')
      .pipe(handlebars())
      .pipe(wrap('Handlebars.template(<%= contents %>)'))
      .pipe(declare({
          namespace: 'MyApp.templates',
          noRedeclare: true, // Avoid duplicate declarations
      }))
      .pipe(concat('templates.js'))
      .pipe(gulp.dest('js/dist'));
});

gulp.task('scripts', function () {
    return gulp.src(['js/lib/jquery/dist/jquery.js', 'js/lib/handlebars/handlebars.runtime.js', 'js/dist/templates.js', 'js/app/**/*.js'])
      .pipe(concat('bundle.js'))
      .pipe(uglify())
      .pipe(gulp.dest('js/dist/'));
});
The key section is the ‘templates’ task. Translating:
- read all *.hbs templates
- process thru handlebars() precomilation
- setting the namespace MyApp.templates
- output to a single JS file js/dist/templates.js
The scripts task combines all the JS files to one bundle.js. However, i had some trouble debugging the code, so i first ran the JS without a bundle. I changed the html to use traditional javascript references instead of the bundle.js:
<head>
    <title>Handlebars Test</title>
    <script src="../js/lib/jquery/dist/jquery.min.js"></script>
    <script src="../js/lib/handlebars/handlebars.runtime.min.js"></script>
    <script src="../js/dist/templates.js"></script>
    <script src="../js/app/app.js"></script>
</head>
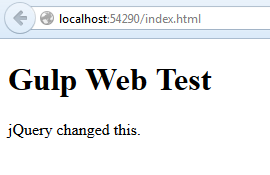
The load order is important– libraries, then templates, then the main app code. After fixing bugs, i get the desired HTML output in page:
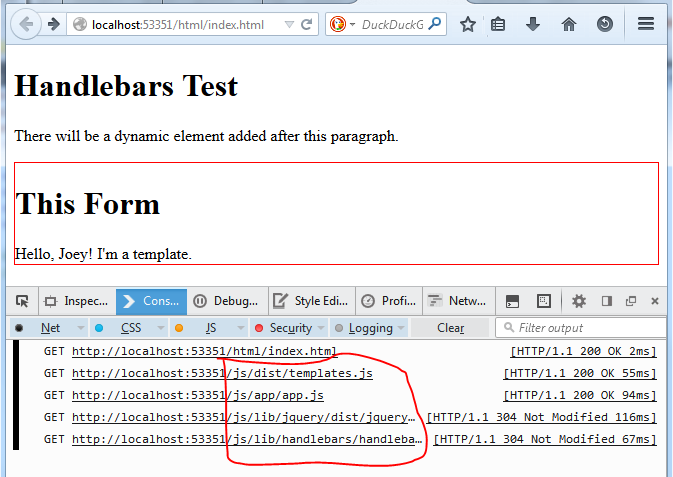
Note the multiple GET requests. But it functionally is working.
Run the bundled version
Now that the JS code runs the templates with jQuery OK, we can remove the multiple script references and switch to the single bundle.js script.
Don’t forget to execute the ‘gulp’ build again (on the command line or via visual studio). Looking at the gulp ‘script’ task, note the order of the bundling concatenation needs to be the same order as the <script> tag includes would be in the above example. Otherwise, things wlil get out of order.
gulp.task('scripts', function () {
    return gulp.src(['js/lib/jquery/dist/jquery.js', 'js/lib/handlebars/handlebars.runtime.js', 'js/dist/templates.js', 'js/app/**/*.js'])
      .pipe(concat('bundle.js'))
      .pipe(uglify())
      .pipe(gulp.dest('js/dist/'));
});
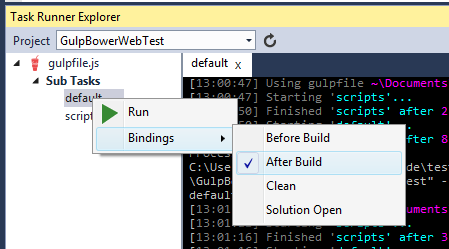
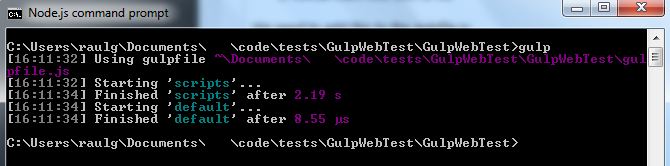
Run the ‘gulp’ task again to build, via the command line or via the VS Task Runner Explorer, or the post-build event (i haven’t yet learned to use ‘watch’ to auto-rebuild). Don’t forget to change the HTML back to load /bundle.js instead of the multiple JS files.
Running/reloading the page, we finally get the precompiled templates inserted into the html page, via the single bundle.js:
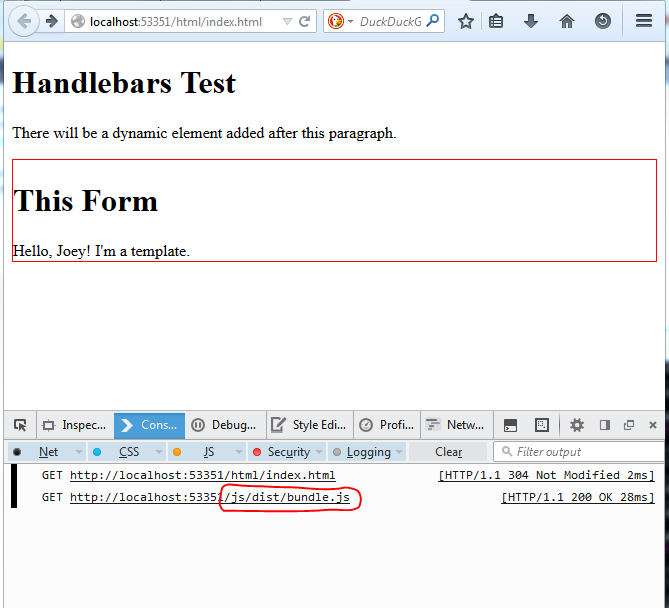
This stuff gets a bit crazy! Why do this? I guess i want to compile, process, and optimize my javascript code.
The project code is here: https://github.com/nohea/Enehana.CodeSamples/tree/master/HandlebarsTest . Without the /node_modules directory, since the file paths are too long for Windows ZIP. To reconstitute the directory, cd to the project folder, and run:
cd HandlebarsTest\HandlebarsTestnpm update
That will reconstitute the packages from the internet, since all the dependencies are listed in the package.json file. It also allows you to easily exclude the node_modules directory from version control, and allow other developers to ‘npm update’ to populate their own directories.