
As I start looking into building more high-performance web apps, we are lead into the area of Javascript and CSS bundling and minification. I know my “old-school” Javascript coding, but in recent years, there’s been a huge movement in the JS community regarding the whole toolchain, so i’m jumping in here.
There is a Microsoft ASP.NET way to do bundling now, as well as the ServiceStack Bundler project, which uses node.js . However, that also has some dependency on ASP.NET MVC code.
Since most of the development in this area has been built in the JavaScript / HTML / CSS community, the most mature tools are there. So i’m going to do a documented test of the tools in use. In recent years, i’ve done most web development in Visual Studio w/C#, Javascript, HTML, CSS. But i do have a background in professional Perl web development (years ago), so i have a different perspective. I’m coming at the new front-end JS toolsets from a point of discovery, so this may be most useful if you are also new to it. Don’t treat this as a “how to do it the best way” article.
Grunt is a “JavaScript Task Runner”, which can be thought of as a build tool for JS code. It uses node.js for executing tasks.

Gulp is another JavaScript Task Runner. It is in the same role as Grunt, but works with a JS code function instead of a JSON config. Also, it uses Node Streams instead of temp files, and does not require a ‘plugin’ per library. I was going to write a Grunt how-to, but i changed my mind and will do Gulp.
We want some kind of task runner, since we need to:
- read all the JS library files and ‘minify’ them to take up the least space possible
- bundle the files into one JS file, to reduce the number of HTTP requests the client needs to make
Thus, static files will not work. The task runner need to run during design time, and probably build/deploy time as well.
Installing the Toolset
First to install the toolset on Windows, the FAQ has recommended:
- Installing msysgit (which will be installed if you have my favorite Git Extensions installed)
- Installing node for windows
- using Command Prompt or Powershell as a command line (i use command prompt here)
Then we can figure out later how to make it easier to use in Visual Studio and MSBuild.
OK, i installed Node and npm, the Node.js package manager. Think of node of being it’s own platform with its own infrastructure, its own EXE, and its own set of installable packages. NPM is how you install packages.
Installing Grunt (via NPM)
According to the getting started page, we install grunt-cli via NPM.
Run the “Node.js command prompt” as Administrator by right-clicking it in the start menu. Note: this is NOT the green “Node.js” shortcut, which will not work. Then in the prompt, type:
npm install -g grunt-cliYou will see it download and install. But never mind that/skip it, cause i just changed my mind (Javascript fashion changes rapidly – just hang on for the ride, and just make sure you know what problem a tool does before you try to use it). I like the gulpfile code syntax better that the grunt json format, and i heard it builds faster too.
Installing Gulp (via NPM)
Now that i changed my mind, here’s how we can install Gulp via NPM: (from the Getting Started)
npm install --global gulp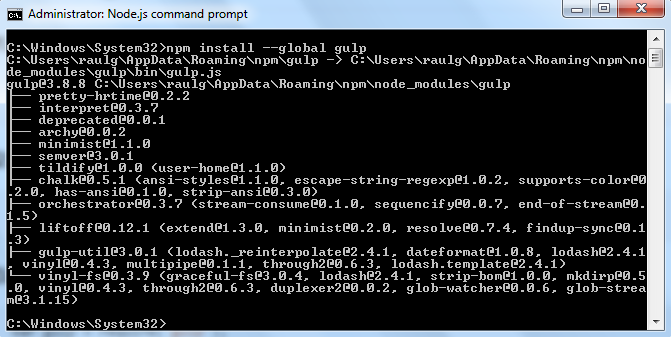
Seems to have installed some dependent libs i know nothing about. No prob.
This is a global install on your machine. It seems you will also have to install it per project using npm “devDependiencies” with the –save-dev flag. More on that later. Global installs are for command-line utilities. If you are using client-side libs, you install them or require() them in your project.
Creating a New Web Project using Gulp
You can do this with no IDE by creating an empty directory and start there. But since my team uses Visual Studio, i will create an empty ASP.NET web app and install there manually.
In VS 2013, Add New Projects, ASP.NET , name it, and select the “Empty” template. That will create the minimal project.
For kicks, add a static HTML file for testing later. Right-click the project, Add -> HTML page. Call it index.html.
Installing Gulp to the project
In the Node command prompt (doesn’t have to be Administrator mode), cd to your project directory (not the solution directory).
npm install gulp --save-dev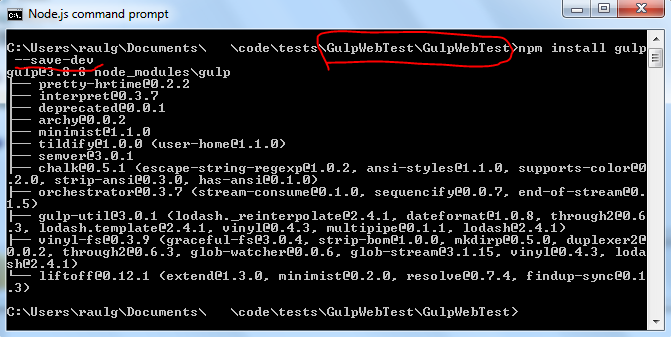
This will install the Node infrastructure to the project as a /node_modules/ directory.
I recommend clicking the “View All Files” button in Solution Explorer and also clicking the “Refresh” button.
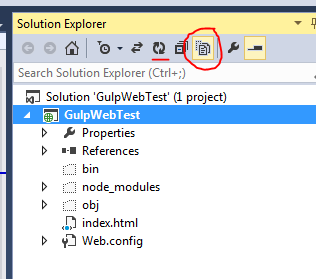
This will show you the files not tracked by VS, but in the directory.
Create the minimal gulpfile.js
Right-click the project, and add new text/js file called gulpfile.js . The minimal file will contain:
var gulp = require('gulp');

gulp.task('default', function() {
  // place code for your default task here
});
Now on the command line, you can run the default ‘gulp’ command, which will do nothing.

Installing other JS libraries for use (via NPM)
The point of using a JS build tool is including other JS libraries in your project, for use at build time or run time. So for the sake of proof-of-concept, i will install the uglify lib (for minification), concat to bundle all js scripts, and the JQuery lib (for use in our client-side scripts).
There is a special gulp-uglify plugin (a bunch of others too), so we install that in the same way with npm.
npm install gulp-uglify --save-devconcat also has a gulp plugin:
npm install gulp-concat --save-devI will install the standard JQuery lib as well. Note i can use NPM to install it, or i could have it Microsoft-style and install using NuGet. The only difference would be the path to the *.js files in the project.
npm install jquery --save-devjQuery installs to: /node_modules/jquery/dist/jquery.js
Create a primitive “real” app
I’m going to create a /scripts/app.js file which does a simple jQuery DOM manipulation.
// my app
$(document).ready(function () {
    $('#message-area').html("jQuery changed this.");
});
Also, the index.html file will reference/run the app.js and jquery scripts.
<!DOCTYPE html>
<html xmlns="http://www.w3.org/1999/xhtml">
<head>
    <title>Gulp Web Test</title>
    <script src="node_modules/jquery/dist/jquery.min.js"></script>
    <script src="scripts/app.js"></script>
</head>
<body>
    <h1>Gulp Web Test</h1>
    <div id="message-area">Static DIV content.</div>
</body>
</html>
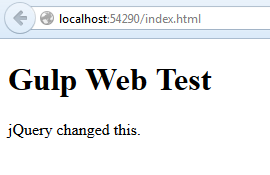
When you execute this traditional, static version of the app, it will run as expected:
Starting to put it together
Now we configure the gulp file to run our 3 tasks together:
- minify our JS scripts
- concat them into one JS file
We need to add this to the gulpfile.js:
var gulp = require('gulp');
var uglify = require('gulp-uglify');
var concat = require('gulp-concat');

gulp.task('default', ['scripts'], function () {

});

gulp.task('scripts', function () {
    return gulp.src(['node_modules/jquery/dist/jquery.js', 'scripts/**/*.js'])
      .pipe(concat('main.js'))
      .pipe(gulp.dest('dist/js'))
      .pipe(uglify())
      .pipe(gulp.dest('dist/js'));
});
Note i’ve created a new ‘scripts’ task, which is added as a dependent task to the ‘default’ task. The ‘scripts’ task is using the jquery.js file and all the *.js files in the /scripts/ directory as sources. They all go thru concat(), output to main.js , in the dist/js/ directory. They then go thru uglify().
Next,we run the ‘gulp’ command on the node command line. After a couple back and forth errors and corrections, we get this:
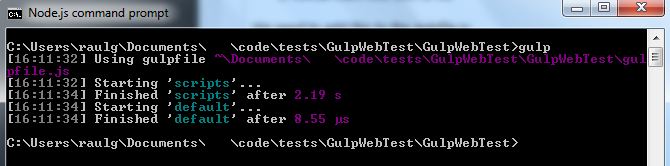
In Solution Explorer, you can refresh and now see the /dist/js/main.js file which was created.
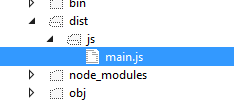
It should contain our custom js code as well as the whole jQuery.
Then we can update the HTML reference to the new output bundle.js file, and see if it runs the same way. Delete the script tags for jquery.js and app.js, and add a single one for main.js
<script src="dist/js/main.js"></script>
When you run the same index.html in the browser, you should get the same “jQuery changed this.” output, even though the only js file is ‘main.js’. The output main.js is only 83K. I’m sure it could get smaller if we use gzip, etc. But it proves the concept works. It should be very easy to add other JS modules as needed.
The downside is installing this stuff to the project added 2,000 files under /node_modules/, adding about 12MB.
Visual Studio and MSBuild Integration
I did find some info on how to run Gulp and Grunt from withing VS as a post-build command, and hopefully in MSBuild as well:
For Gulp, we can just add a post-build step in the project –
- right-click the project -> Properties…
- click “Build Events”…
- to the “Post-build event command-line:” add the following:
cd $(ProjectDir)
gulp
That will run the ‘gulp’ command via VS when you ‘build’, instead of having to use the command line. Much more convenient. You can delete the main.js file, then ‘build’ again – it will regenerate. Reference: Running Grunt from Visual Studio post build event command line
http://stackoverflow.com/questions/17256934/running-grunt-from-visual-studio-post-build-event-command-line .
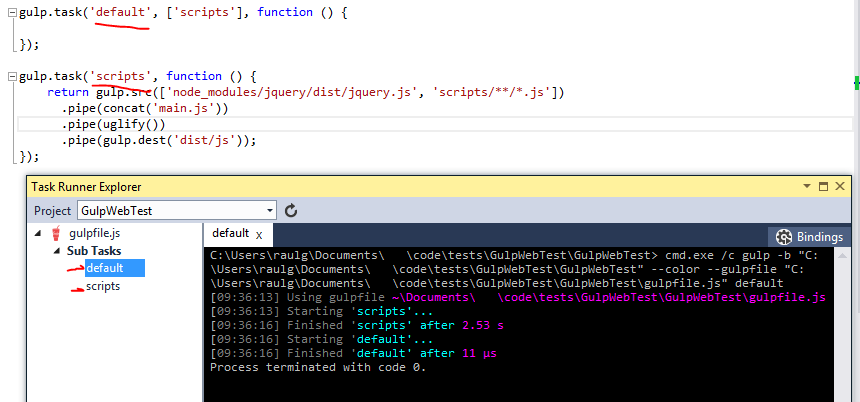
Possibly much more full-featured and useful is the “Task Runner Explorer” VSIX extension. This is basically “real” tooling support in VS. I haven’t tried it yet, but i expect to try it.
Code for this post can be found here: https://github.com/nohea/Enehana.CodeSamples/tree/master/GulpWebTest
Update: I installed the Task Runner Explorer per the article above. It does work to view/run targets in the Gulpfile.js, so you don’t have to run on the command line, or have to build to execute the tasks.
Update 2: i have a follow-up post: Using Bower for JS package management instead of NPM
Resources
Thank you so much
Was struggling to get all in single location