
One of ServiceStack’s benefits is having one service method endpoint output to all supported serializers. The exact same code will output formats for JSON, XML, CSV, and even HTML. If you are motivated, you are also free to add your own.
Now in the case of CSV output, the web browser handling the download will prompt the user to save the text/csv stream as a file. The ‘File Save’ dialog will fill in the name of the file, if it is included in the HTTP response this way:
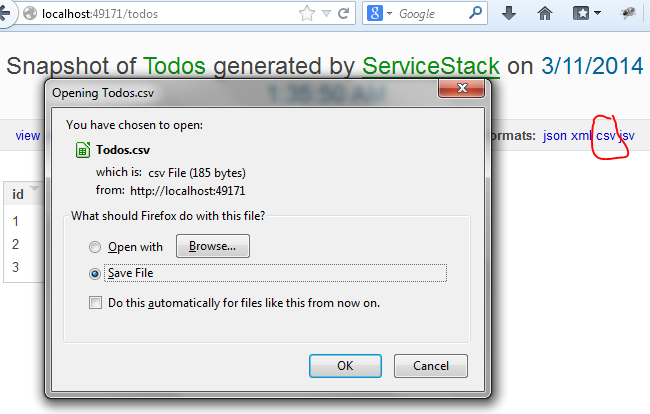
Note the filename is “Todos.csv”, because the request operation name is “Todos”. (i’m using the example service code).
There could be many cases where you would like to have much more fine-grained control of the default filename. However, you don’t want to pollute the Response DTO, since that would ruin the generic “any format” nature of the framework. You’ll probably also want to be able to have different filename-creation logic per-service, since you’ll often have many services in one application.
In my attempt to get to the bottom of this,
- I create a new blank ASP.NET project. The version i want is the 3.9.* version, since i’m not up on the v4 stuff.
- Using this site, i can identify the correct version of the NuGet package, and install the correct ones: https://www.nuget.org/packages/ServiceStack.Host.AspNet/3.9.71
- Then i install from the console.
PM> Install-Package ServiceStack.Host.AspNet -Version 3.9.71
- I see all my references are 3.9.71
- My web.config has the ServiceSTack handlers installed, and my project has the App_Start\AppHost.cs
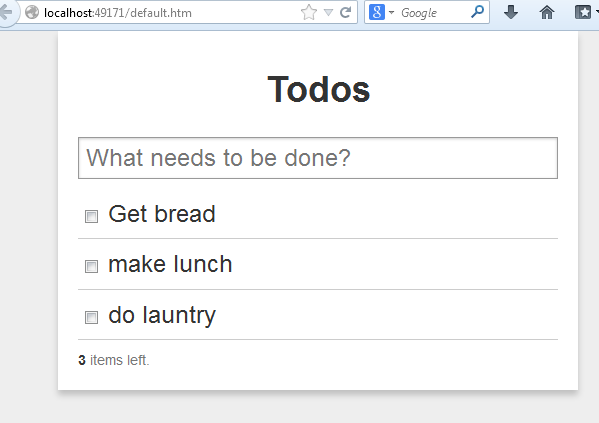
The demo project is the ToDo list. I’ll use it to test the CSV output. First, add a few items:
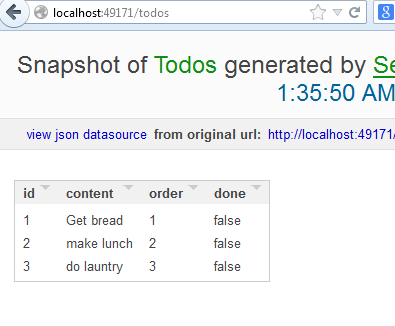
Then try to get the service ‘raw’:
http://localhost:49171/todos
You will see the generic ServiceStack output page:
Next, click the ‘csv’ link on the top right, in order to get the service with a ‘text/csv’ format. You will get the prompt dialog, as shown at the top of this post, with the ‘Todos.csv’ filename.
if you inspect the HTTP traffic in Fiddler, the request is:
GET /todos?format=csv HTTP/1.1
the response of looks like this:
HTTP/1.1 200 OK
 Cache-Control: private
 Content-Type: text/csv
 Vary: Accept-Encoding
 Server: Microsoft-IIS/8.0
 Content-Disposition: attachment;filename=Todos.csv
 X-Powered-By: ServiceStack/3.971 Win32NT/.NET
 X-AspNet-Version: 4.0.30319
 X-SourceFiles: =?UTF-8?B?QzpcVXNlcnNccmF1bGdcRG9jdW1lbnRzXGVuZWhhbmFcY29kZVxFbmVoYW5hLkNvZGVTYW1wbGVzXFNzQ3N2RmlsZW5hbWVcdG9kb3M=?=
 X-Powered-By: ASP.NET
 Date: Tue, 11 Mar 2014 01:43:52 GMT
 Content-Length: 88
Id,Content,Order,Done
 1,Get bread,1,False
 2,make lunch,2,False
 3,do launtry,3,False
The Content-Disposition: header defines the default filename of the save dialog box.
So how is this set? ServiceStack’s CSV serializer code sets is explicitly.
The best way i’ve discovered to do this is to plug in your own alternative CsvFormat plugin. If you view the source code, you’ll see where it sets the Content-Disposition: header in the HTTP Response.
    //Add a response filter to add a 'Content-Disposition' header so browsers treat it natively as a .csv file
    appHost.ResponseFilters.Add((req, res, dto) =>
    {
	    if (req.ResponseContentType == ContentType.Csv)
	    {
		    res.AddHeader(HttpHeaders.ContentDisposition,
			    string.Format("attachment;filename={0}.csv", req.OperationName));
	    }
    });
The docs for ServiceStack’s CSV Format are clear on it:
https://github.com/ServiceStackV3/ServiceStackV3/wiki/ServiceStack-CSV-Format
A ContentTypeFilter is registered for ‘text/csv’, and it is implemented by ServiceStack.Text.CsvSerializer.
Additionally, a ResponseFilter is added, which adds a Response header. Note the Content-Disposition: header is explicitly using the Request ‘OperationName’ as the filename. Normally this will be the Request DTO, which in this case is named ‘Todos’.
res.AddHeader(HttpHeaders.ContentDisposition,
        string.Format("attachment;filename={0}.csv", req.OperationName));
So, what if we want to replace the default registration with different logic for setting the filename? We won’t need to change the registered serializer (still want the default CSV), but we should remove the ResponseFilter and add it in a slightly different way.
If you want to remove both, you can remove the Feature.Csv. However, in this case i just want to change the filter. I had trouble altering the response filter directly, so instead i created my own ‘CsvFilenameFormat’, which looks almost exactly like ‘CsvFormat’. The difference is that i try to get a custom filename from the service code, by looking in Request.Items Dictionary<string, object>.
The differing code in CsvFilenameFormat.Register():
    //Add a response filter to add a 'Content-Disposition' header so browsers treat it natively as a .csv file
    appHost.ResponseFilters.Add((req, res, dto) =>
    {
        if (req.ResponseContentType == ContentType.Csv)
        {
            string csvFilename = req.OperationName;

            // look for custom csv-filename set from Service code
            if( req.GetItemStringValue("csv-filename") != default(string) )
            {
                csvFilename= req.GetItemStringValue("csv-filename");
            }

            res.AddHeader(HttpHeaders.ContentDisposition, string.Format("attachment;filename={0}.csv", csvFilename));
        }
    });
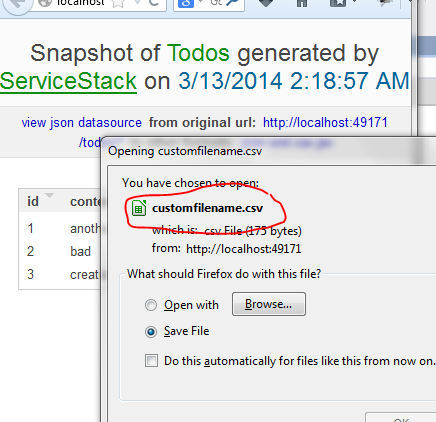
So if the service code sets a custom value, it will be used by the text/csv response for the filename. Otherwise, use the default.
In the service:
        public object Get(Todos request)
        {
            // set custom filename logic here, to be read later in the response filter on text/csv response
            this.Request.SetItem("csv-filename", "customfilename");
So the mechanism is set up, all we need to do is properly prevent the default Csv ResponseFilter and use our own instead.
In AppHost Configure(), add a line to remove the Csv plugin, and one to install our replacement:
            // clear
            this.Plugins.RemoveAll(x => x is CsvFormat);

            // install custom CSV
            Plugins.Add(new CsvFilenameFormat());
At this point, everything is in place, and we can re-run our web app:
That’s the show. Thanks.